Wednesday, May 14, 2014

Medicine Cabinet basket

While having fun looking at all of the wonderful things on Pinterest, I came across THIS fun idea for storing medicine.  You take a basket, paint it white, and then paint a red cross on it.  How cool is that? 

Well, I didn't have nice huge baskets laying around, so I used a smaller one.  I like how it turned out too :)

I started hand painting it, because I didn't think I had any white spray paint.  Luckily I remembered that my husband had some from when he made his Star Wars costume (which I want to put up here, but he's still not fully done!)

The spray paint made it so much easier and faster.  Then I taped off the cross part and hand painted it, which was not as difficult as I imagined it to be.  I'm excited that my medicine area will look a bit more organized now!

Here it is:


Recycled Thrive cans!

I was wondering what I should do with all of my used Thrive cans and I've seen many ideas online.  Currently I don't have a yard, as we are living in an apartment complex.  I really miss my garden and yard from our old house! 

Anyway, I decided that I would use the cans to plant some flowers in and add some beauty to our front area.

I drilled 3 holes in the small pantry cans, and 4 cans in the #10 cans.  Then all I did was fill them with dirt and the flowers and watered them.  

Here is the result:


Also, because my Mom does not yet have a headstone, I decided to make some memorial flower pots for her.  I created the pictures in Word, printed them on card stock, and did a home laminate job.  Here they are:


So those are some fun options to do with those cans laying around!


Friday, February 14, 2014

Valetine's Day hearts :)

Today, I really wanted to do a Valentine's craft with the boys!  I honestly forgot about Valentine's Day this year...so weird.  

Anyway, we started out with cutting out felt hearts.  We then used hot glue to attach the puff balls for eyes and pipe cleaners for the mouths.  I will have to take a better picture of them!  


The other project, I did while the boys were napping.  I used cardboard for the hearts and yarn, felt, and a mesh fabric to decorate!


 Here are the boys, modeling our front door!


Happy Valentine's Day!!

Sunday, February 2, 2014

5 year Anniversary present

I haven't posted in a while, so I'll begin again with my latest project! 

I could not think of anything to get my hubby, so I went to Pinterest to search for something special that I could give to him.

Here is what I based my present on.  I think I liked how mine turned out, especially since I was running out of time.


Here it is on our table after I surprised Jaren with it.


 And a close up!

I was wanting to do a picture from each year anniversary and one of when each of our kids were newborns.  I ended up doing a few more than that, because it was fun.  I also realized that only one picture was taken on our anniversary, so I made sure to take some of us last Friday; I hope we will make it a tradition!

Tuesday, August 6, 2013

Re-Post of 2 really fun projects

This is a re-post from my family blog.  These are two projects that I had a ton of fun making.  I am actually planning on doing name letters for my other little boy once we move!

Wall Hangings
I cut up scrapbook paper and taped the pieces together. I then grabbed my stencil and wrote words on them. The paper matches the colors in my living room! I also have two other frames to fill in to make a "box" of the 4 pictures.


I have always wanted to make hanging letters of Devlin's name for over his bed. I found the letters at Joann Fabrics for $1 each and I bought the paint at Walmart for about $1 each.


Next I painted a base color on each of the letters.


Last, I taped off different patterns and shapes with masking tape and painted different colors for each. I took off the tape and was left with pretty cool name letters!


Friday, July 26, 2013

Transportation Birthday Cake

My kids just turned 3 and 1 in June.  They are 2 years and 6 days apart and it's a ton of fun having them close in age.

My 3 year-old LOVES trains.  Anything to do with trains, he wants it.  My 1 year-old likes all sorts of transportation and is just starting to attach himself to cars.  So I decided to do a transportation birthday party for them.  It was a lot of fun, and my favorite part was the cake.

Here it is:


Here is the overall picture I took.  It's just really too bad that I didn't think more about the background when I took the pictures.  I'm really bad at that...


Here is a close up (and over-flashed) picture of the train I made out of Rice Krispies and fondant.  I also bought eyes for the train and car to make them a bit more cute.  I used Chocolate sprinkles for the coal in the back and I cut little circles out of oreo-type cookies for the wheels.

Here is the car that I made.  I used Rice Krispies and fondant, along with the eyes and cookie wheels. 

The road with the car led to Kade's tunnel with his 1 birthday candle.


The Chocolate flavored licorice train tracks led to Devlin's tunnel with his 3 candle.

Here's another look at it.  I almost forgot to mention the lake in the back with a licorice boat.  Wish I had gotten a close up of it! 

Here's a better picture that my sister-in-law took when the cake had been brought outside for the party.  Way better background and overall picture!!

Well, I think I learned a lot from doing this cake.  Mainly, I learned that I need to learn how to take better pictures :)  I also learned that I need a better platter to put my cakes on.  Also, I learned that I still really love creating cakes.  It's been way too long since my last cake! 

Wednesday, July 24, 2013

DIY Felt & Wooden Dowel Flowers

My kids love doing crafty things.  I love crafty things.  Sometimes we actually love doing them on the same day too! 

I always seem to have ideas floating around in my head for what to do with the kids each day, craft specific mainly.  Either I don't find/make the time, or the kids are not interested or in the mood for crafts. 

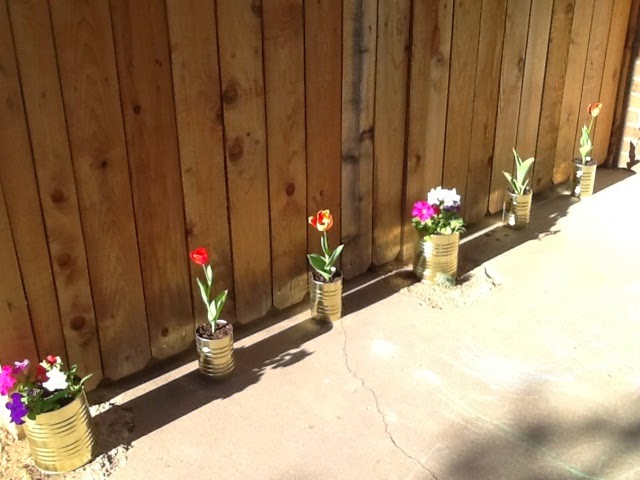
One day though, everything worked out perfectly and we all crafted together :)  I had been wanting flowers for our yard and garden for quite some time, and back in May I decided just to make some fake flowers to bring color into our yard without spending the big bucks.

Here is what we came up with:


Here's Devlin showing off his work :)


We did several variations of flowers.  I really liked how the yellow ones turned out.


Here's a pretty purple flower; different angle.


Devlin playing with his new creation :)  He loved the whole project!

I cut out all of the felt to make several different flower variations, then I cut out yellow pieces for the middle parts, and then green for the leaves. 

Hot glue was our friend in putting these together on the wooden dowels.  They have held up pretty well in our yard, through all sorts of weather (for about 3 months now).